Price comparisons across different brands and cities
How to Make Concrete with Cement and Sand

How To Guide

How to Mix Cement: Step-by-Step Guide for Perfect Ratios [2024]

Picture of Written by:
Written by:
Reviewed by: Nagm

How to Mix Cement: A Comprehensive Guide

Mixing cement properly is crucial for any construction project, whether you’re a DIY enthusiast or a professional builder. This comprehensive guide will walk you through how to mix cement effectively, ensuring solid and durable results for your projects. We’ll cover everything from understanding cement types and mixing ratios to step-by-step instructions and expert tips.

How to mix cement

Understanding Cement and Concrete

Before diving into the mixing process, let’s clarify the difference between cement and concrete:

  • Cement: A fine, powdery substance that acts as a binder when mixed with water.

  • Concrete: A mixture of cement, water, sand, and aggregates (gravel or crushed stone).

Types of Cement

Choose the correct type of cement for your project:

  1. Portland Cement: The most common type used in general construction.

  2. Quick-Setting Cement: Ideal for repairs and projects requiring rapid hardening.

  3. High-Alumina Cement: Used in refractory applications due to its heat-resistant properties.

  4. Sulfate-Resisting Cement: Designed for structures exposed to high sulfate environments.

  5. White Cement: Used for decorative purposes and architectural finishes.
Opt for Portland cement for most general construction projects due to its versatility and wide availability. Check: Latest Cement Prices

Cement Mixing Ratios

Understanding cement mixing ratios is crucial for achieving your mixture’s right strength and consistency. Use these ratios as a guide:

  • General purpose mix: 1 part cement, 2 parts sand, 3 parts aggregate

  • Potent mix (for foundations): 1 part cement, 2 parts sand, 2 parts aggregate

  • Mortar mix: 1 part cement, 4-5 parts sand
Remember to measure these ratios by volume, not weight. The water-to-cement ratio is critical – aim for 0.35 to 0.45 for most applications. Too much water weakens the concrete, while too little makes it difficult to work with.

Tools and Materials for Mixing Cement

Gather these tools and materials before you start:

Materials:

  • Cement
  • Sand (sharp sand for concrete, fine sand for mortar)
  • Aggregate (gravel or crushed stone for concrete mixes)
  • Water

Tools:

  • Cement mixer or mixing area
  • Wheelbarrow
  • Trowel
  • Shovel
  • Measuring containers or buckets
  • Protective gear (gloves, goggles, dust mask, steel-toed boots)
  • Plastic sheeting (to protect the ground)
  • Hose or water source
  • Wooden mixing board (for hand mixing)
  • Concrete mixing hoe (for hand mixing larger quantities)

Invest in quality tools to make cement mixing more accessible and more efficient. Consider using a cement mixer for larger projects, while hand mixing suits smaller jobs.

Steps for Mixing Cement

Follow these steps to mix your cement effectively:

Prepare Your Workspace

  • Choose a flat, clean surface near your project site.
  • Lay down plastic sheeting to protect the ground and ease cleanup.
  • Set up your cement mixer or designate an area for hand mixing.
  • Gather all your tools and materials.
  • Wear protective gear, including gloves, goggles, dust masks, and steel-toed boots.

Measure Your Materials

  • Use measuring containers to portion the cement, sand, and aggregate according to your chosen ratio.
  • For smaller projects, use a bucket or wheelbarrow as a measuring unit.
  • Place the dry ingredients near your mixing area.
  • Dry Mix the Ingredients
Step-by-step How to mix cement by hand

Before adding water, thoroughly mix the dry ingredients:

For cement mixer:

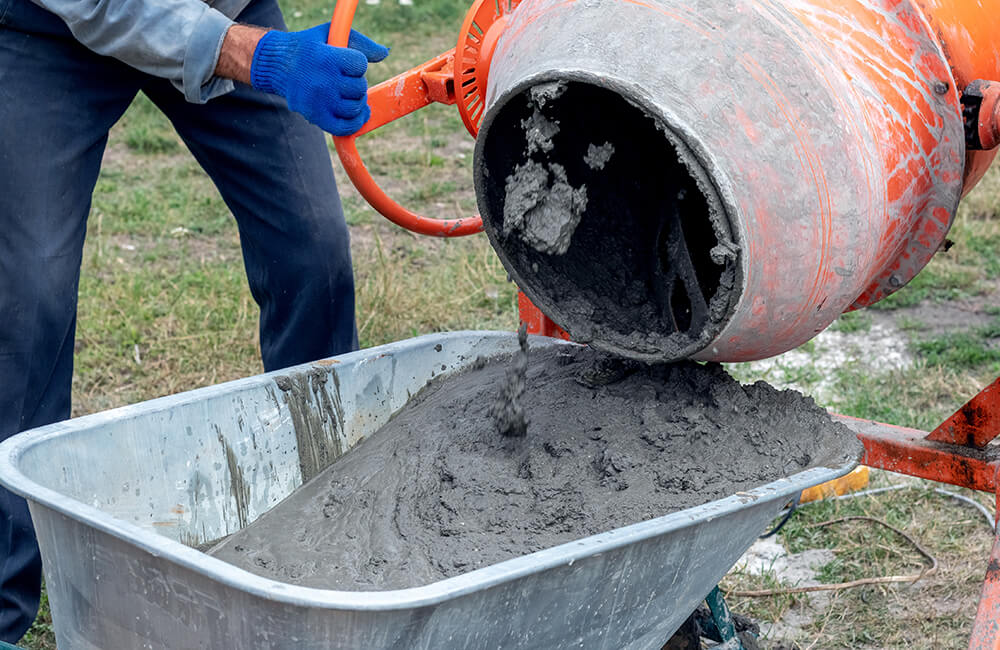
  • Add the dry ingredients to the mixer in the correct proportions.
  • Turn on the mixer and combine the materials for about a minute.

For hand mixing:

    • Create a mound with your dry materials on a flat surface or wheelbarrow.
    • Use a shovel to mix the dry ingredients thoroughly, turning the pile over several times until the color is uniform.

Add Water Gradually

  • Create a slight depression in the center of your dry mix.
  • Add about 2/3 of your estimated total water need gradually.
  • For machine mixing, add the water slowly as the drum turns.
  • Use a hose with a spray nozzle or a bucket to add water gradually for hand mixing.

Mix Thoroughly

  • For machine mixing, let the mixer run for about 3-5 minutes after adding water.
  • Use a shovel or concrete mixing hoe to blend the materials for hand mixing.
  • Work from outside the pile towards the center, turning the mix over repeatedly.
  • Continue mixing until you achieve a uniform consistency with no dry spots.

Adjust the Consistency

  • If the mix is too dry, add small amounts of water and continue mixing.
  • If it’s too wet, add small amounts of the dry ingredients in the correct ratio.
  • Aim for a workable consistency that’s manageable.

Test the Consistency

  • Use your trowel to lift some of the mixture.
  • Check that the cement holds its shape without being too dry or too wet.
  • When you smooth the surface with a trowel, look for a relatively smooth finish with a slight sheen of moisture.

Use or Transport the Mix

  • Once your cement is mixed to the right consistency, use it immediately for your project.
  • For larger projects, transport it in a wheelbarrow to your work area.
  • Work efficiently as cement begins to set quickly.

Check this Guide: How to Make concrete

Tips for Perfect Cement Mixing

Follow these expert tips to ensure the best results:

  1. Prioritize Safety: Always wear proper protective gear to avoid skin contact or inhalation of cement dust. Improper handling of cement can cause severe skin irritation and respiratory issues.

  2. Mix in Batches: For larger projects, mix cement in smaller batches rather than one large mix.It ensures consistency and prevents premature setting.

  3. Consider Weather Conditions:
    • Use cold water to slow the setting process and prevent premature drying in hot weather.
    • In cold weather, use warm water to speed up the setting process.
    • Avoid mixing cement in extreme temperatures when possible.

  4. Cure Properly: After applying your cement mix, keep it damp for at least seven days to ensure adequate strength development.

  5. Clean Up Promptly: Clean your tools and cement mixer immediately after use to prevent cement from hardening. Use a wire brush and water to scrub off any residue.

  6. Maintain Consistent Mixing Time: Whether using a machine or mixing by hand, ensure consistent mixing times for uniform batches.

  7. Avoid Overmixing: While thorough mixing is essential, overmixing can introduce too much air into the mix, weakening the final product.

  8. Use Clean Materials: Ensure your sand and aggregates are free from organic matter or other contaminants that could affect the strength of your cement.

  9. Measure Water Accurately: Use a consistent method for measuring water to maintain the correct water-to-cement ratio across batches.

  10. Plan Ahead: Calculate the amount of cement needed for your project to avoid wasting excess mixed cement

Troubleshooting Common Cement Mixing Issues

Even with careful preparation, you might face some challenges when mixing cement. Here’s how to address common problems:

  1. The mix is Too Dry:

    • Problem: The mix is too stiff and difficult to work with.
    • Solution: Add small amounts of water gradually, mixing thoroughly after each addition.

  2. The mix is Too Wet:

    • Problem: The mix is soupy and needs to hold its shape.
    • Solution: Add small amounts of dry ingredients in the correct ratio, mixing well after each addition.

  3. Cement Setting Too Quickly:

    • Problem: The mix is hardening before you can finish working with it.
    • Solution: Use cold water in the mix, work in smaller batches, and consider using a retarding admixture for large projects in hot weather.

  4. Cement Not Setting:

    • Problem: The mix remains soft long after it should have been set.
    • Solution: Check that you’re using fresh cement and that your mix ratios are correct. In cold weather, protect the cement from freezing.

  5. Cracking in Finished Product:

    • Problem: You notice cracks forming as the cement dries.
    • Solution: This often results from rapid drying. To ensure proper curing, keep the cement damp and protected from direct sunlight and wind.

     6. Cement Not Setting:

  • Problem: The mix remains soft long after it should have been set.

Solution: Check that you’re using fresh cement and that your mix ratios are correct. In cold weather, protect the cement from freezing.

       7. Cracking in Finished Product:

  • Problem: You notice cracks forming as the cement dries.
  • Solution: This often results from rapid drying. To ensure proper curing, keep the cement damp and protected from direct sunlight and wind.

Environmental Considerations

When mixing cement, consider these environmental factors:

  • Dust Control: Minimize dust creation to reduce air pollution. Work in a well-ventilated area and consider using dust-reducing additives.
  • Water Management: Avoid washing cement residue into storm drains or waterways. Dispose of washout water properly.
  • Material Efficiency: Calculate your needs accurately to minimize waste. Consider using supplementary cementitious materials like fly ash or slag to reduce the carbon footprint of your mix.
  • Recycling: Use recycled aggregates in your mix to reduce the demand for new raw materials.

Conclusion

Mastering cement mixing is valuable for any construction or home improvement project. By following above mentioned steps and understanding proper cement mixing ratios, you can create a robust and reliable mixture every time. Remember, practice makes perfect, so don’t be discouraged if your first few attempts aren’t ideal. With experience, you’ll develop a feel for the perfect consistency and mixing technique.

Whether laying a foundation, repairing concrete, or working on a small DIY project, apply these principles of mixing cement. Pay attention to your ratios, mix thoroughly, and always prioritize safety. With the knowledge from this guide, you’re well-equipped to tackle your cement mixing projects with confidence.

For large-scale projects or if you need clarification on any aspect of cement mixing, consult a professional. They can provide guidance specific to your project and ensure that you achieve the best possible results.

Most Popular